Railway Lamp
codeAfter being given a battered old oil lamp that had been hanging disused in a garage, I thought that cleaning it up and adding a new light source would be nice little project.
What is it?
I didn't have any information about the lamp, but after a bit of searching, it seems to be an old British Rail lamp that would have been hung on the rear of a train. It has a single red Fresnel lens and a clear circular window on either side. I haven't been able to find out much about the style of lamp, but from the position of the side windows it seems likely that they were used for inspection - to provide a quick way to check on the burner and level of oil inside.
The lens itself is a nice deep red, and focusses most of the light out in a parallel beam along the axis of the lens. Which is great if you want a fairly direct beam for signalling, but not so great if you want to use it as an ambient light in the home, where it would be desirable to be viewable from much wider angles.
I found that adding a sheet of diffusing semi-transparent plastic just behind the lens helps create a more uniform intensity across the surface and a smoother fall-off as you move out of the main beam. More of a glow than a shine, which is just what I wanted.
Cleaning
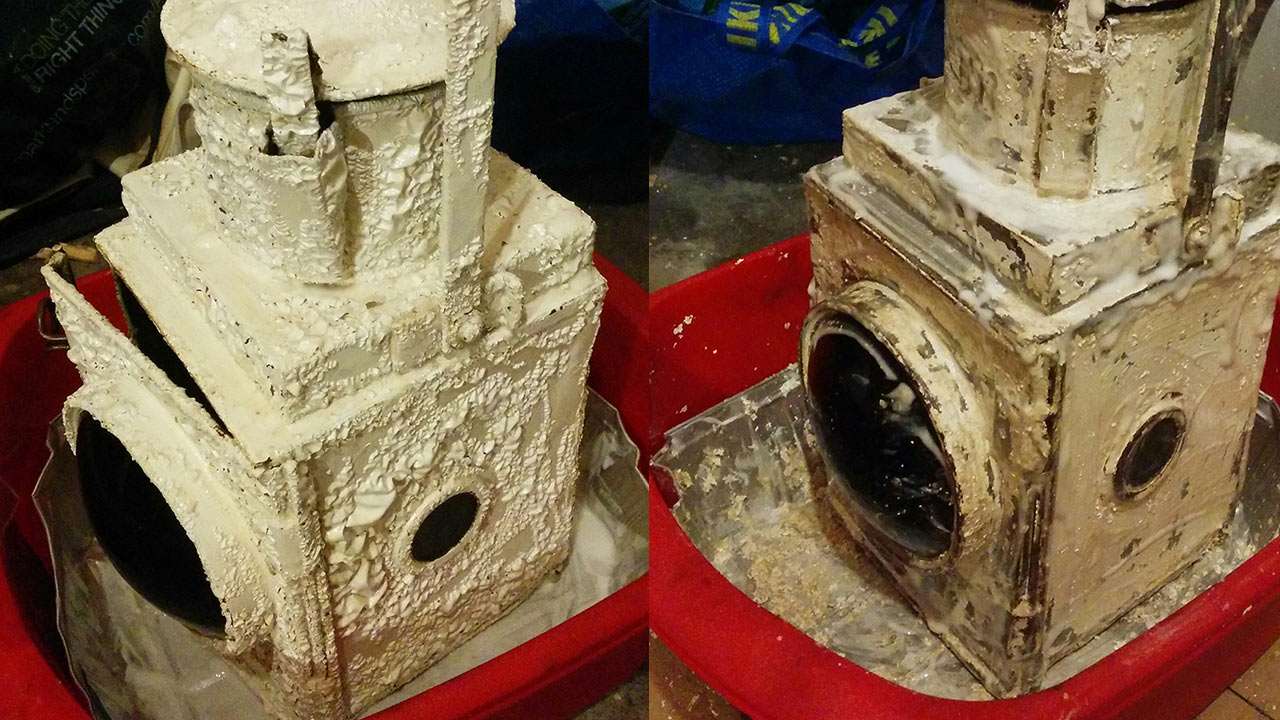
Cleaning a well-used old oil lamp, inside and out, is a bit of a messy job. It's not the speediest either; with oily run-off, paint, and some none too friendly chemicals in play, all the waste had to be collected and disposed of appropriately.
It was also a lot dirtier than I expected, quite rusty in parts, and judging by the buckling around the bottom, had been dropped more than once during its lifetime. The interior oil burner assembly was missing entirely, and a combination of the fall-damage and years of rust had made the lower half a bit wobbly.
For those reasons, I wasn't too concerned about ruining an antique by cleaning everything up and stripping away the exterior paintwork.
A couple of washes with near-boiling water and dishwasher detergent (sodium percarbonate) worked pretty well at clearing a lot of the grime, but it needed a few final rinses with white spirit to clean the remaining oily deposits. Then it was ready for the exterior paint to be removed.
There were a few layers of paint, so removing it required a couple of overnight exposures to paint stripper, followed by a good deal of peeling and scraping. That said, I didn't worry too much about leaving a few stubborn patches of paint dotted about. I quite like seeing some remnants of the paintwork around edges and corners.
Lighting
I had a few 8x8 red LED matrices doing nothing, and since the lens is red, thought they would be perfect for this. Not wanting to screw or glue anything inside to create a supporting structure, I instead opted to use bits of wood from an old wardrobe, trimmed to just the right size and wedged into place.
The clear side windows are covered with more semi-transparent plastic to diffuse the light there. Circles of plastic are held in place against the outer wall with some small magnets.
There's an Arduino Nano controlling and powering the LEDs. They don't require much power, but it will get a bit crashy if they're all turned on and set at their maximum brightness.
Luckily, I didn't want them to be static and always-on. Instead, each matrix randomly turns pixels on and off, so the total number of lit pixels at any one time is only a fraction of the total. There's still plenty of illumination, and the random shifting patterns of light make it much more interesting to look at.
The code is pretty simple. The LedControl library does the hard work, and I only have to manage when individual pixels get turned on or off.
Power
I found a suitable DC supply in a box of various unused power supplies - I tend to hold onto a PSU if it's not broken, they're handy things to have. Especially when dabbling with Arduino, where most models will happily run on a wide range of DC voltages.
There are some small ventilation holes running along the bottom of both sides of the lamp, and they enter a cavity below the main platform inside. The power cable uses one of those holes near the rear, and is passed up to some pins on the floor of the enclosure.
Done, for now.
I had fun working on the lamp, and I'm happy with how it turned out.
Staying with the lighting theme, I'm now working on some more ambitious projects, taking on more design and build rather than just upcycling an existing object.